Wednesday, 27 January 2021

Khalkin Gol/Nomonhan - Japanese Forces

 The Japanese forces were as expected, largely infantry based with their standard knee mortars in their 4 rifle company battalions. They also had a large number of tanks but these were largely Ha-Go or I-Go tanks and struggled against the Soviet Armoured Cars, which mounted an effective 45mm gun.

Most of the figures are Early War Miniatures, with a variety of manufacturers for the vehicles including IBG, 172scale.com, BPM. The mules are Raventhorpe with additional 'bits' to tell them apart from each other.

64th Infantry Regiment HQ:

RHQ

Gun battery - 75mm Mountain Gun

Anti-tank battery - 37mm A/T Gun


Infantry Battalions

1st Battalion and 2nd Battalions, 64th Infantry Regiment and 2nd Battalion, 28th Infantry Regiment.

HQ with A/T rifle

4 x Companies including knee mortars

Heavy Weapons Company - 2 x MMG and 70mm gun


2nd Field Artillery Battalion

 2 x 75mm Field Gun Batteries

1 x 120mm Howitzer Battery


Yasuoka Detachment

HQ, AA Platoon (20mm), 3 sniper teams


3rd Tank Regiment

1st Company - Type 97 Chi-Ha, 2 x Type 89 Otsu

2nd Company - 3 x Type 89 Otsu

3rd Company - Typy 97 Te-Ke, 2 x Type 94 TK


4th Tank Regiment

1st Company - 3 x Type 95 Ha-Go

2nd Company - 3 x Type 95 Ha-Go

3rd Company - Type 95 Ha-Go, 2 x Type 89 Otsu


Air Support

1 x Ki-27 'Nate' fighter
1 x Ki-15 'Babs' bomber


A bit of fluff:

A couple of stands to show Banzai charges:


Finally, a team photo:


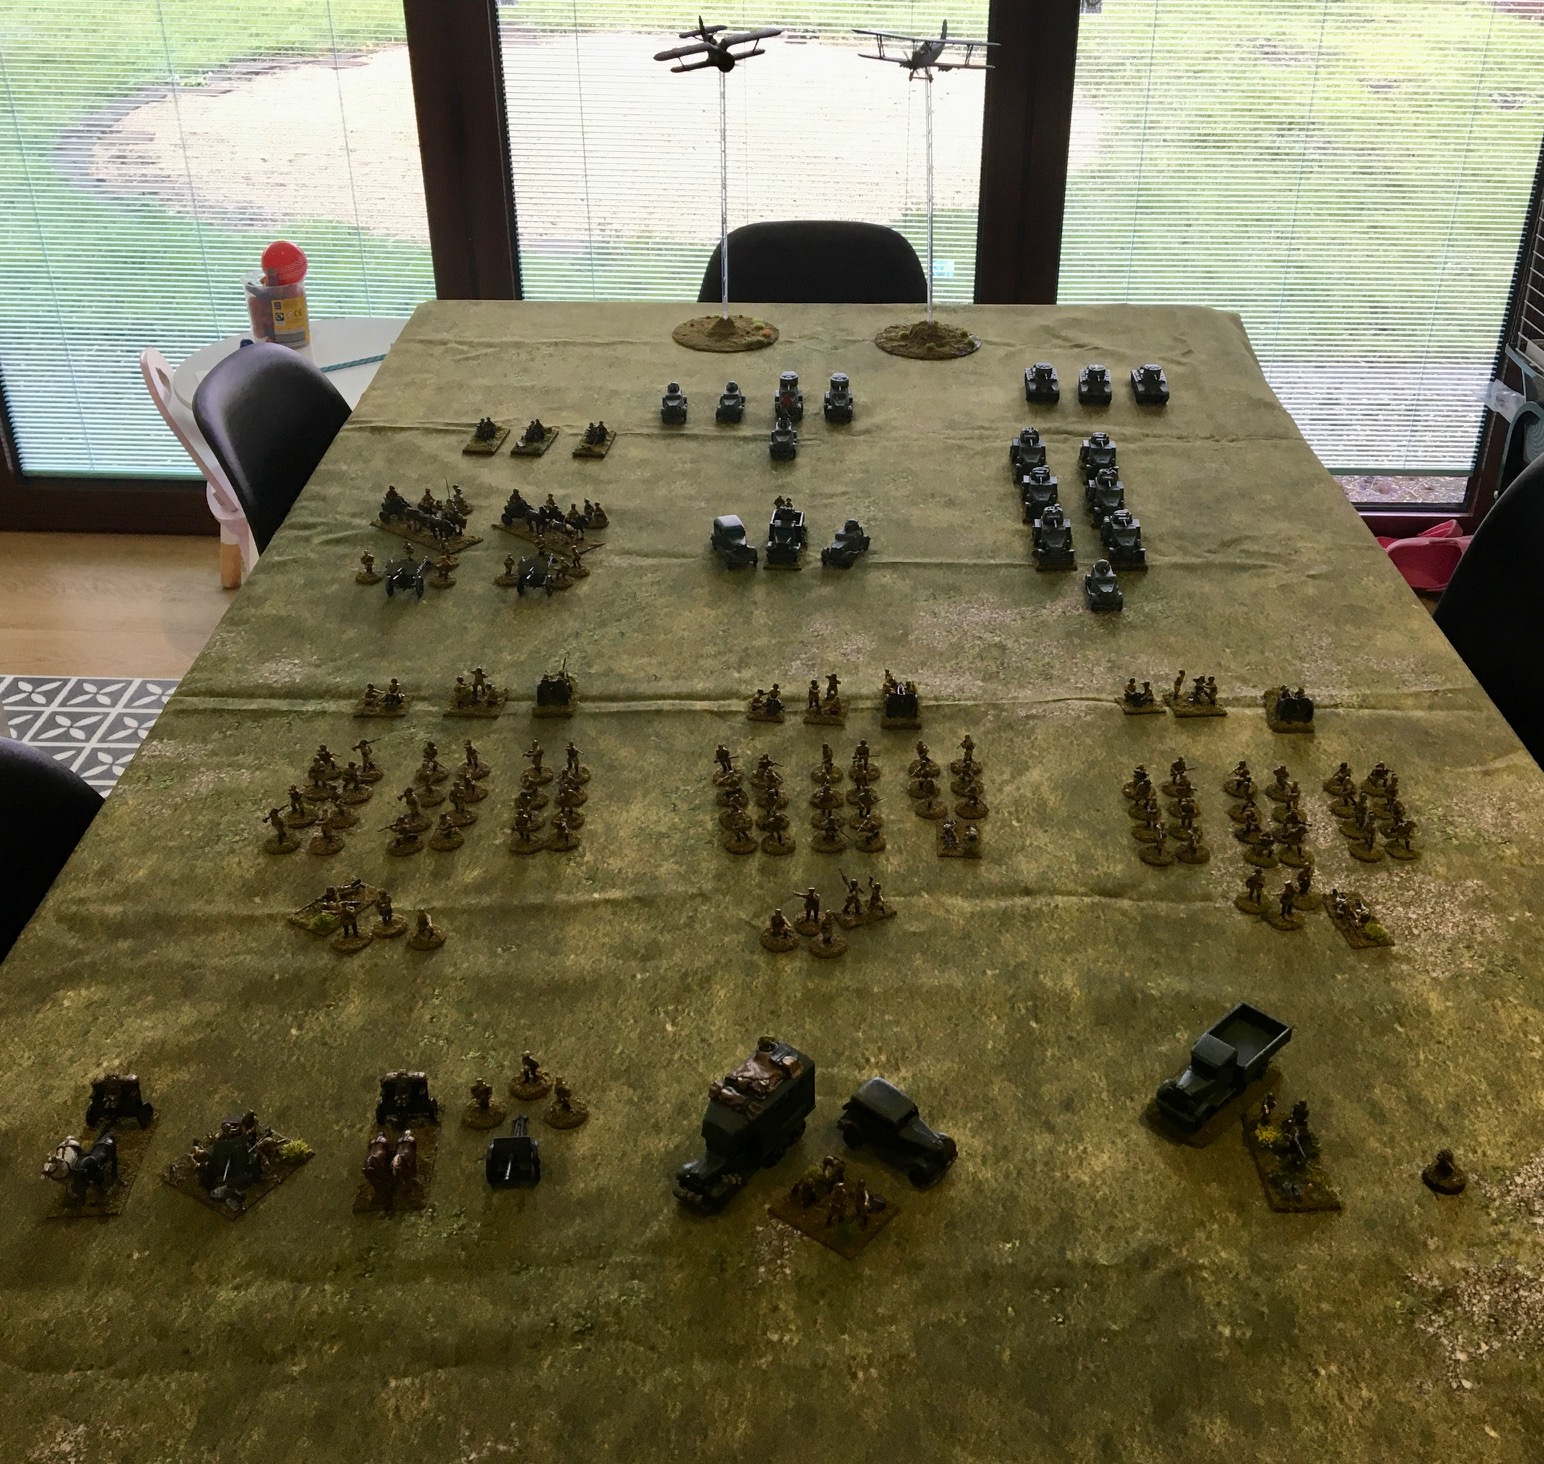
Khalkin Gol/Nomonhan - Soviet forces

 I've been collecting Soviet forces for some time, as you will see from my Rostov project. I've used many of those figures for my Khalkin Gol Russian contingent, but with other figures added as well.


The main unit represented in the scenario is the 149th Motor Rifle Regiment:

149th Motor Rifle Regiment

Regiment HQ:


Three Battalions of infantry: HQ with Anti-Tank Rifle, 3 Rifle companies, a Heavy Weapons company with a Maxim MMG and a 81mm mortar, and an M1927 76mm Infantry Gun:


Artillery Company:76.2mm M1902/30 Field Gun, and Anti-Tank Company with a short-barrelled 45mm:


Heavy Weapon Platoon with a 12.5mm DShK HMG and a sniper team:


1st Battalion, 175th Artillery Regiment

2 x 122mm M1910/30 Howitzers plus OPs:


9th Mechanised Brigade

HQ (car); GAZ AA truck; Recon Platoon of a BA20 Armoured Car:

241st Armoured Car Battalion

HQ - BA20

3 Armoured Car Companies, each of 2 x BA6 or BA10:


240th Recon Battalion

HQ - BA20

Light A/C Coy - 2 x BA20

Medium A/C Coy - 2 x BA6

Motorcycle Coy - 3 x motorcycle combos


2nd Battalion, 11th Tan Brigade

3 x BT-5


Air Support

1 x R-5 light bomber (shown by a Po-2 at present)
1 x I-153 Chaika fighter


Finally, a team photo!


Khalkin Gol project

 It's been a while - nearly two years - since last posting. Life has been busy as always, even in the pandemic (key worker!) but I have been modelling and painting still, albeit not much wargaming recently.


My main project over the past couple of years has  been Khalkin Gol, the Japanese/Soviet border dispute of summer 1939. However, the forces could also be used for Lake Khasan in 1938. I'll get a few Chinese troops at some point for a small Sino-Japanese wargame.


Why Khalkin Gol - or Nomonhan, as the incident was known in Japan? I'd recommend this book by Stuart D Goldman. In short, the conflict 'cast a long shadow', and affected the timing of the Soviet invasion of Poland, and the ongoing tension between Japan and the Soviets also had an influence on the timing of the Soviet counterattack relieving Moscow in 1941. There are also rumours that Japan would invade the Eastern portion of the USSR if Stalingrad fell hence the terrible battle there. Goldman also argues that the events at Khalkin Gol influenced the decision by Japan to attack Pearl Harbour and 'go South'.


It is worth remembering that the USSR was the only major nation in the war to avoid a two-front conflict. The events at Nomonhan/Khalkin Gol were a key factor in that outcome.


I've found an old scenario for Rapid Fire written by Brad Smith - alas since disappeared into the ether - but I will try and post my scenario files up on the blog for folks to use. I've adapted it and plan to run it as a 'mini campaign' if I can.

In short, it covers the days in early July 1939 when the Soviets tried to consolidate their beachhead over the Khalkin Gol River, and the Japanese launched an attempted pincer move to cut them off. The Soviets launched a large counter attack under the command of someone named Zhukov (!) and the Japanese faultered.

Tons of EW tanks and armoured cars, what's not to like?

Friday, 15 February 2019

Soviet Cavalry Regiment for Rapid Fire

Here is my finished Cavalry Regiment for Rapid Fire, taken from the original second supplement ‘Unit Organisations for the Russian Front, 1941-1945’. It is set up as an early war Regiment from 1939-1942. Most of the figures are Britannia, but I have supplemented some of the figures from my existing Russian forces. The HQ horsemen are from Sgts Mess and the Tachankas are from Kelly’s Heroes.

Regimental HQ:


4 x Sabre Squadrons, existing figures to be used if dismounted:


Engineer Platoon:


Regimental Gun Battery:


Regimental A/T Battery:


Regimental MG Battery:


AA Platoon:


Thursday, 14 February 2019

Painting technique

I’ve been able to paint a bit more recently which has been nice.

A while ago I was fortunate enough to be ‘handed down’ some Britannia Russian Cavalry from a wargaming friend. Looking at the Rapid Fire Orbats I realised I was very close to having an early war Cavalry Regiment.... so I’ve been working on those!

Churning out so many has given me the opportunity to describe my painting technique for my 20mm ww2 figures. I use a different one for my ships of course, and I’ve also used slightly different techniques on my 28mm Aztecs.

So, here we are. I use a similar technique to the standard ‘block and wash’ method.

Firstly, I wash and prep the figures. By washing them in a little detergent water, it removes some of the chemical that is used to remove the model from the mould. I then stick them to their base and use filler (spackle) to mould a little base.


Secondly, I undercoat with a black spray paint - nothing expensive, just a cheap car spray paint from the auto store.


Next, I block in the main colours (note I am just painting the rider here, not the horse) and I’m not concerned how neat it is. This will be tidied up in a later stage.


Now I apply a wash. This is usually Vallejo Sepia Dipping Wash, although I apply it with a brush, not by dipping. I like it with the WW2 models as it really sinks well into the creases and also gives the figures a dirty tone which I think is appropriate for soldiers in the field. It also covers up some of the little bits of model that perhaps the first coat didn’t apply to properly, and gives the face definition as the models are a little too small in my opinion for the full face treatment with eyeballs!


The first highlight follows, which involves taking the original colours and over painting them, albeit leaving the crevices with the wash in not covered. I concentrate on the broad raised areas where light would hit.


The second highlight is either a suitable different colour - eg I use Green Grey (Vallejo) as a second highlight on German Fieldgrey (Vallejo) or a slightly lightened original colour, with a touch of white or Ivory added. I then add the finer details, such as cap colours or metal bits on the rifles or cavalry swords.

 
I don’t always apply both the first and second highlight to all areas. The helmet on this figure has just had a first highlight, while the cavalry scabbard didn’t have the ‘first’ highlight, just the second one. But, the tunic and breeches, blanket, satchel and rifle have had both.

And there we are! Hopefully it has been of use to you.


Tuesday, 11 December 2018

Impetus Aztec Army in 28mm

 
My Aztec army is finally finished! The figures are a mixture of Gringos40, The Assault Group, and Wargames Foundry. They are all based on 2ps and the bases are Warbases Impetus bases. All the figures can, however, be removed from the bases so can be used in the 'En Garde' skirmish game.
 
First up we have the command 'stand'; not all based together. In the front we have Moctezuma himself, flanked on one side by a priest holding a freshly-extracted heart in his hand. On the other side of the Aztec Emperor is an Eagle Warrior with a captive who, one presumes, will soon be handed to the priest! At the back are two Aztec speakers, one wearing a rather fetching human skin suit and other blowing into a conch shell.
 

Next up, we have the elite Cuachique unit, or 'Shorn Ones'. These were the most prestigious of the Aztec warrior groups, having taken at least 7 captives and 3 of which should have been taken against more respected opponents. They were the shock troops of the Aztec army and had taken an oath to never take a step backwards in battle. Recognisable by their distinctive yellow feather suits, shaved heads and painted faces.


Moving down the Aztec pecking order, my army does not at this stage have any Otomi troops but has a unit of Eagle and a unit of Jaguar warriors. The army list for Impetus actually lists one or the other - but I couldn't resist getting both! We can bolster any enemies if we have to! One of these Aztec warriors was called a cuauhocelotl. The word cuauhocelotl derives from the Eagle warrior cuauhtli and the Jaguar Warrior ocelotl. These warriors needed to have taken at least 4 captives in battle.


The final of the 'suited' units is a group of warrior priests. Aztec warrior priests had their own ranking system. For example, 2-captive warrior priests wore a plain white suit, while 3-captive warrior priests wore a plain green one. These warrior priests have taken 4 captives in battle and as such can wear the 'cicitlalo cuextecatl' or 'starry night' suit. This suit is in the Huaxtec style with a coned hat. These style suits, albeit red and black, were worn by 2-captive warriors who weren't priests, called the Cuextecatl.


Next, we come into the non-suited main bulk of the army. Every Aztec man was trained to be a warrior. Farmers and other workers were rallied in times of war. Most of these will not have taken captives although some may have taken one. None have taken more as they do not wear the red Huaxtec suit for taking 2 captives, or the butterfly banner for taking 3. These are the 'peasant levy' for want of a better phrase - the Macehualtin farmers or other men from the regional areas known as Calpolli. As the suited warriors, many are armed with the Macehuitl (obsidian-edged club), cuauhololli (round-headed clubs), or tepoztopilli which was somewhere between a spear and a halberd. Some where the cotton armour called ichcahuipilli.


The final main unit of the army is the unit of bowmen, armed with the Aztec bow, the Tlahuitolli. These were around 5 feet long with arrows tipped with obsidian.


Then, we have the skirmish element of the army. A smaller unit of tlahuitolli bowmen, a unit of slingers armed with the tematatl sling, and a unit of warriors armed with atlatl spear thrower, which increased the range and speed of the missiles.


And to finish the army off, some casualty markers!


In the short term I think the figures will see more use in skirmishes, either against each other or a small Conquistador/Tlaxcalan warband I am putting together.